CentOS+宝塔部署seafile教程
一、准备环境
CentOS7+宝塔,这个太简单,不再描述了。
二、宝塔安装软件
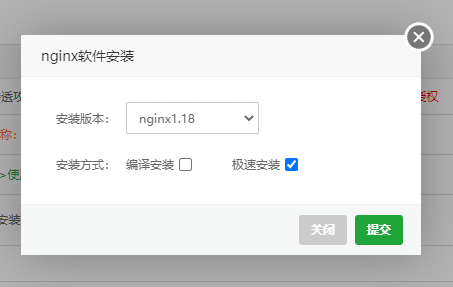
1.Nginx1.18
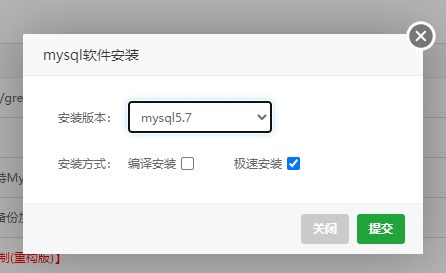
2.MySQL
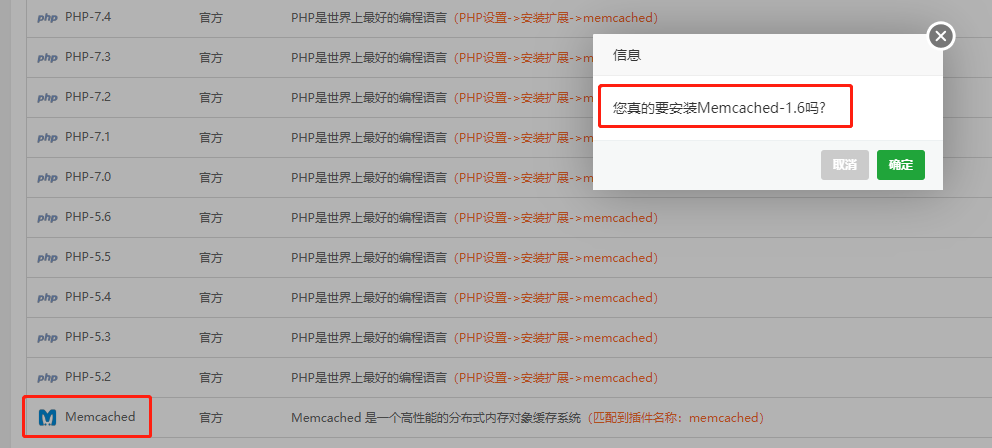
3.Memcached
三、上传seafile安装文件到CentOS
可以根据我的操作来,也可以自己选择上传的位置。
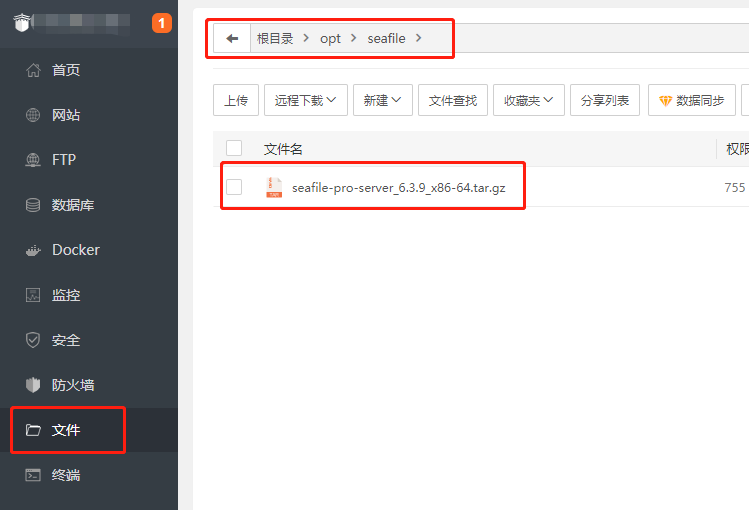
1.在宝塔页面
左侧导航栏中,找到
文件,选择
根目录---
OPT目录,新建文件夹
seafile,然后把压缩包上传至该文件夹,最后文件路径为
/opt/seafile/seafile_pro_XXX.tar.gz
四、查看数据库root密码
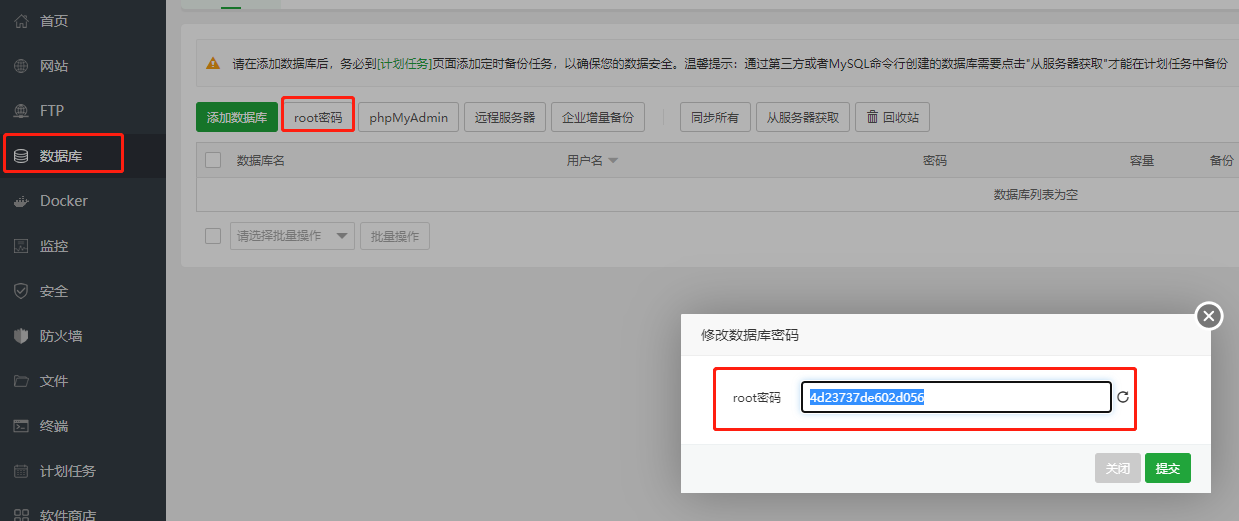
在宝塔页面
左侧导航栏中,找到
数据库,点击
root密码,复制显示的root密码,或者修改为自己需要的密码。
五、开始安装seafile
1.在宝塔页面
左侧导航栏中,找到
终端,输入root密码,进入终端命令界面。
2.在
ssh下,进入
/opt/seafile目录。
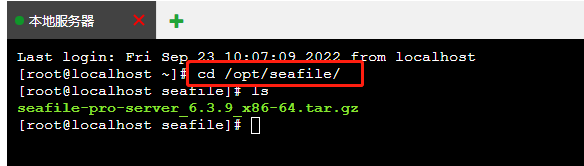
# cd /opt/seafile
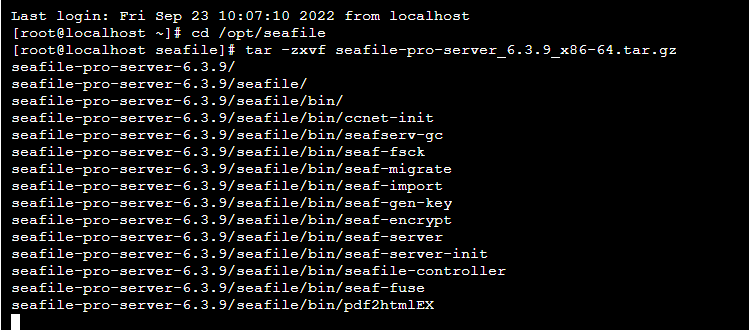
解压上传的安装包文件。
# tar -zxvf seafile-pro-server_6.3.9_x86-64.tar.gz
2.进入解压后的文件夹
# cd seafile-pro-server-6.3.9/
3.执行安装命令
# ./setup-seafile-mysql.sh
4.系统会提示当前缺少什么插件,根据提示复制命令,安装即可。
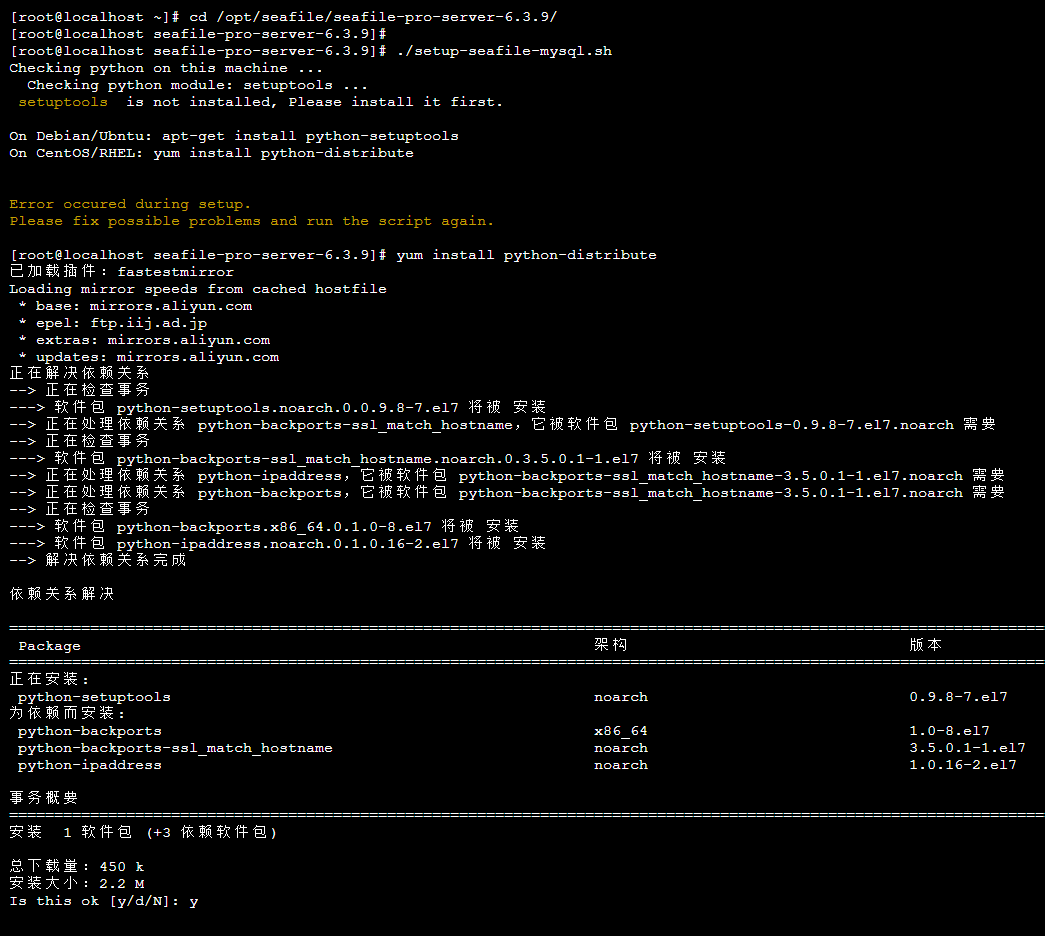
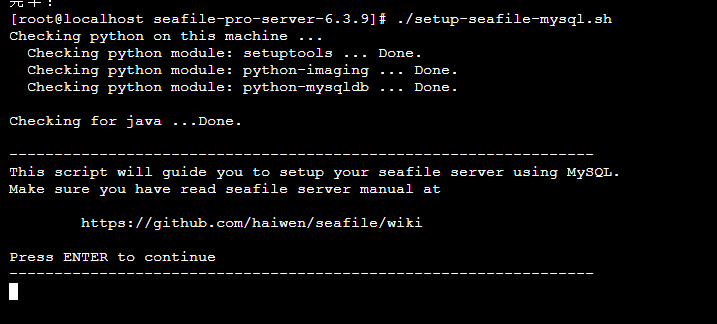
5.重复第3至第4操作,直到开始安装界面,当出现
Press ENTER to continue时,就说明开始安装了。
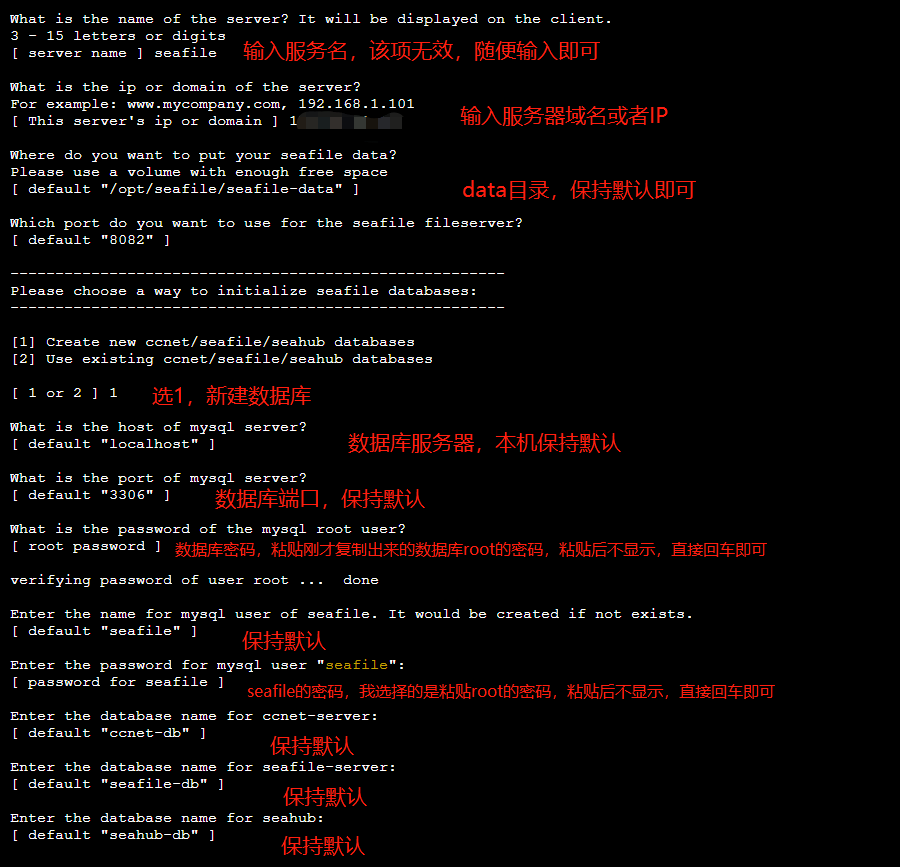
6.根据实际情况,进行配置
What is the name of the server? It will be displayed on the client.
3 - 15 letters or digits
[ server name ] seafile

What is the ip or domain of the server?
For example: www.mycompany.com, 192.168.1.101
[ This server's ip or domain ] 10.0.0.3

Where do you want to put your seafile data?
Please use a volume with enough free space
[ default "/opt/seafile/seafile-data" ]

Which port do you want to use for the seafile fileserver?
[ default "8082" ]

-------------------------------------------------------
Please choose a way to initialize seafile databases:
-------------------------------------------------------

[1] Create new ccnet/seafile/seahub databases
[2] Use existing ccnet/seafile/seahub databases

[ 1 or 2 ] 1

What is the host of mysql server?
[ default "localhost" ]

What is the port of mysql server?
[ default "3306" ]

What is the password of the mysql root user?
[ root password ]

verifying password of user root ...  done

Enter the name for mysql user of seafile. It would be created if not exists.
[ default "seafile" ]

Enter the password for mysql user "seafile":
[ password for seafile ]

Enter the database name for ccnet-server:
[ default "ccnet-db" ]

Enter the database name for seafile-server:
[ default "seafile-db" ]

Enter the database name for seahub:
[ default "seahub-db" ]
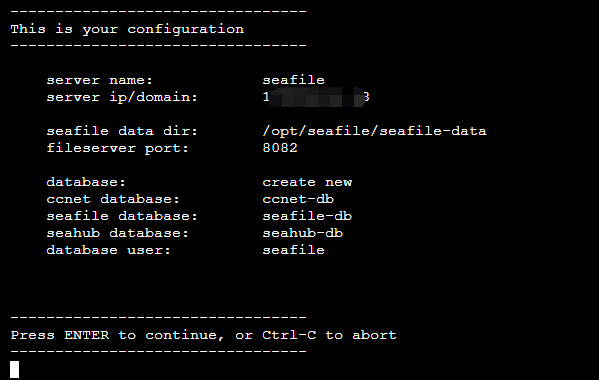
7.确认后,可以查看配置信息,直接回车继续安装。
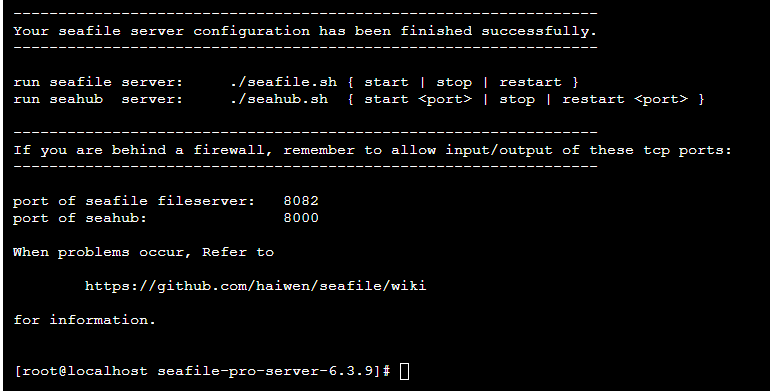
8.安装完成后,可以看到如下内容
六、配置nginx反向代理
1.在宝塔页面
左侧导航栏中,找到
网站,选择
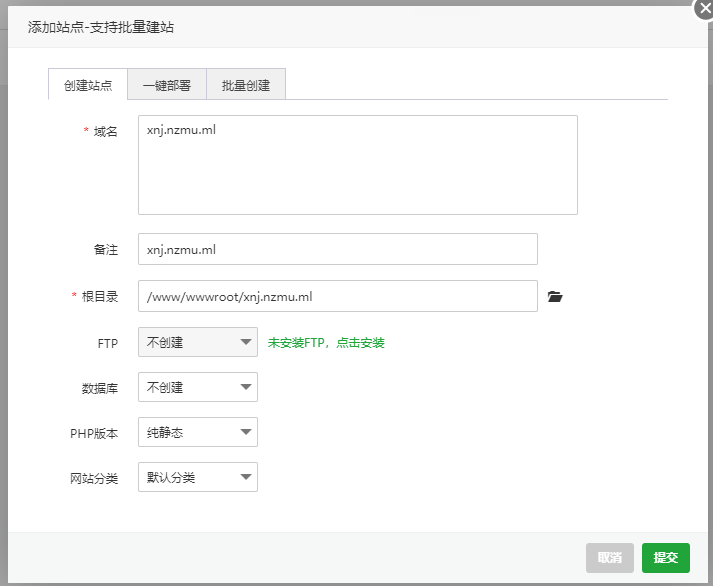
添加站点,域名内输入自己的域名,或者是IP,根目录
保持默认,FTP选择
不创建,数据库选择
不创建,PHP版本选择
纯静态,网站分类选择
默认分类,然后提交。
2.提交后,选择设置网站---配置文件,修改配置文件内容。(该配置文件的主要作用是通过88端口反向代理seafile的8000端口)
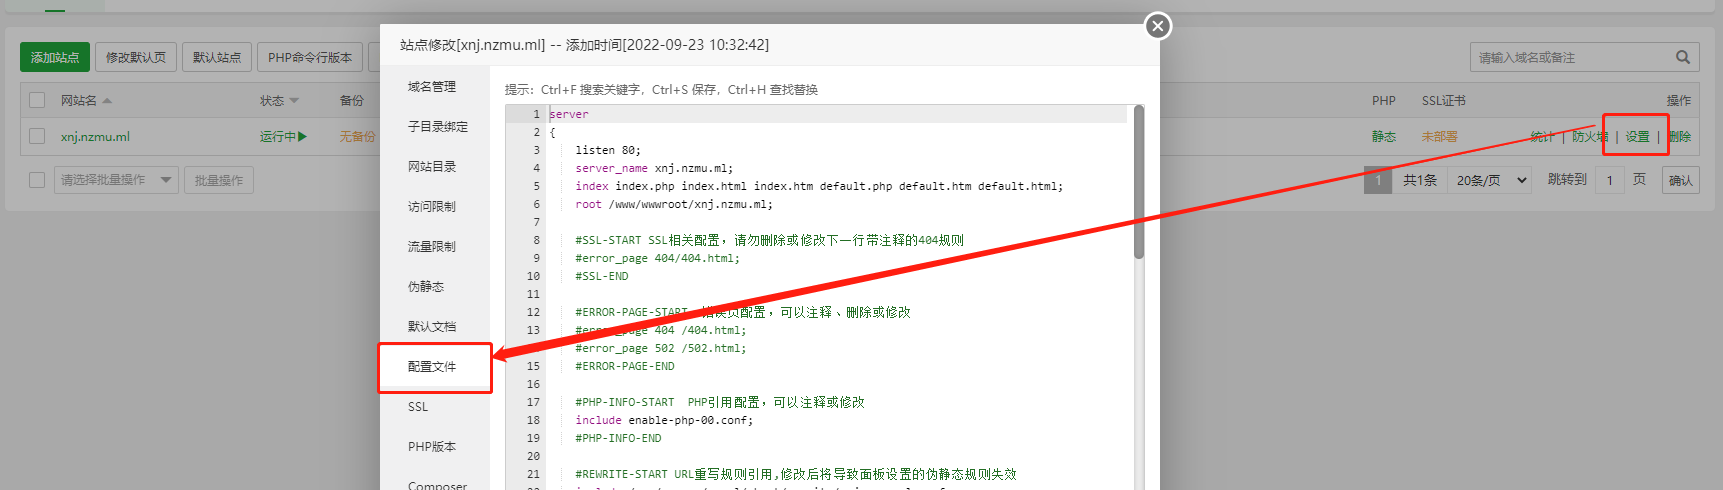
配置文件如下:
server
{
listen 88; #监听端口
server_name xnj.nzmu.ml;  #域名

location / {
proxy_pass http://127.0.0.1:8000;
proxy_set_header Host $host; #解决CSRF verification failed
proxy_set_header X-Real-IP $remote_addr;
proxy_set_header X-Forwarded-For $proxy_add_x_forwarded_for;
proxy_set_header X-Forwarded-Host $server_name;
proxy_set_header X-Forwarded-Proto $scheme;
proxy_read_timeout 1200s;

# used for view/edit office file via Office Online Server
client_max_body_size 0;
}

location /seafhttp {
rewrite ^/seafhttp(.*)$ $1 break;
proxy_pass http://127.0.0.1:8082;
client_max_body_size 0;
proxy_set_header X-Forwarded-For $proxy_add_x_forwarded_for;
proxy_connect_timeout 36000s;
proxy_read_timeout 36000s;
proxy_send_timeout 36000s;
send_timeout 36000s;
}
location /media {
root /opt/seafile/seafile-server-latest/seahub;
}
location /seafdav {
fastcgi_pass 127.0.0.1:8080;
fastcgi_param SCRIPT_FILENAME $document_root$fastcgi_script_name;
fastcgi_param PATH_INFO $fastcgi_script_name;
fastcgi_param SERVER_PROTOCOL $server_protocol;
fastcgi_param QUERY_STRING $query_string;
fastcgi_param REQUEST_METHOD $request_method;
fastcgi_param CONTENT_TYPE $content_type;
fastcgi_param CONTENT_LENGTH $content_length;
fastcgi_param SERVER_ADDR $server_addr;
fastcgi_param SERVER_PORT $server_port;
fastcgi_param SERVER_NAME $server_name;
fastcgi_param REMOTE_ADDR $remote_addr;

client_max_body_size 0;

}
access_log /www/wwwlogs/xnj.nzmu.ml.log;
error_log /www/wwwlogs/xnj.nzmu.ml.error.log;
}
七、启动seafile服务,测试效果
在宝塔页面
左侧导航栏中,找到
终端,输入命令:
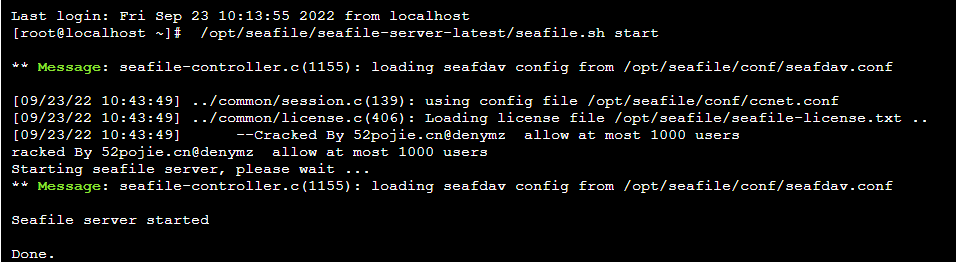
启动seafile服务
/opt/seafile/seafile-server-latest/seafile.sh start
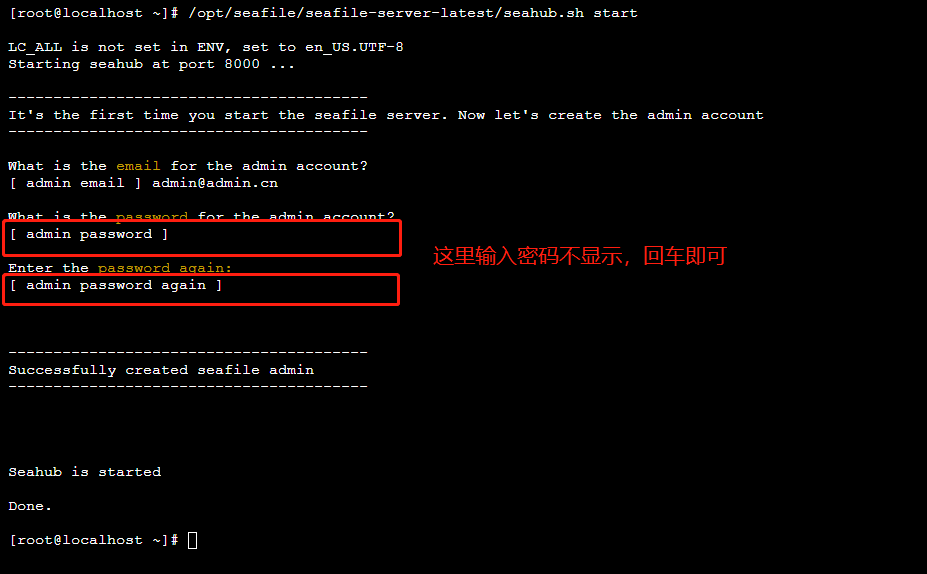
启动seahub服务,首次启动时,会提示设置admin账号信息
/opt/seafile/seafile-server-latest/seahub.sh start
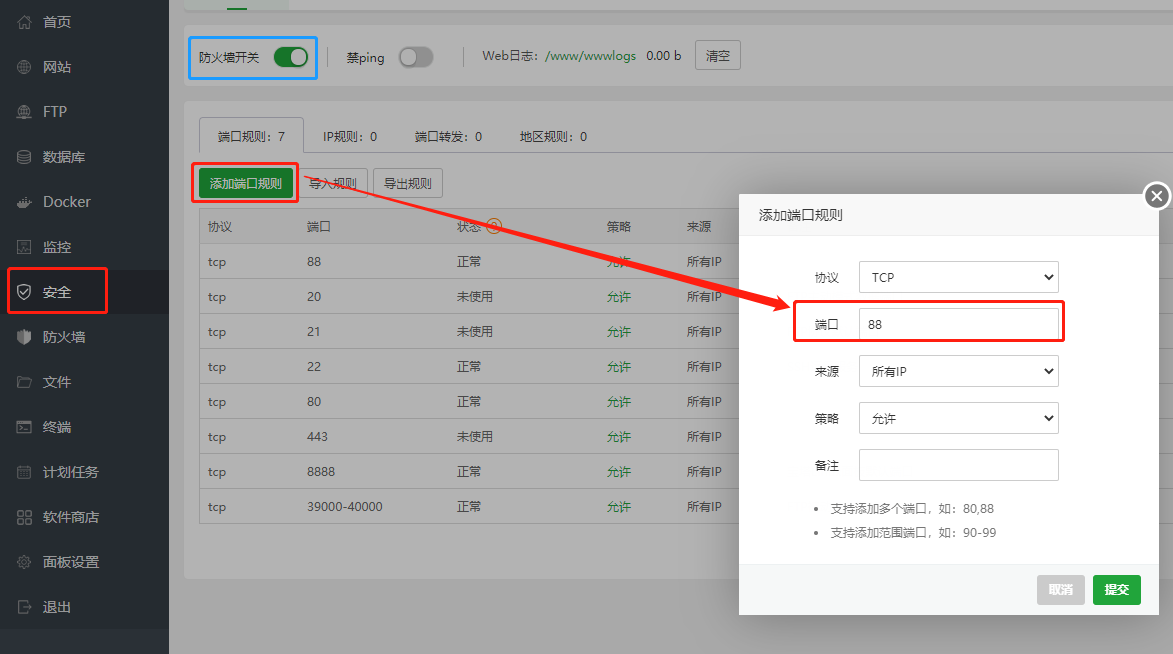
放行88端口,或者关闭防火墙
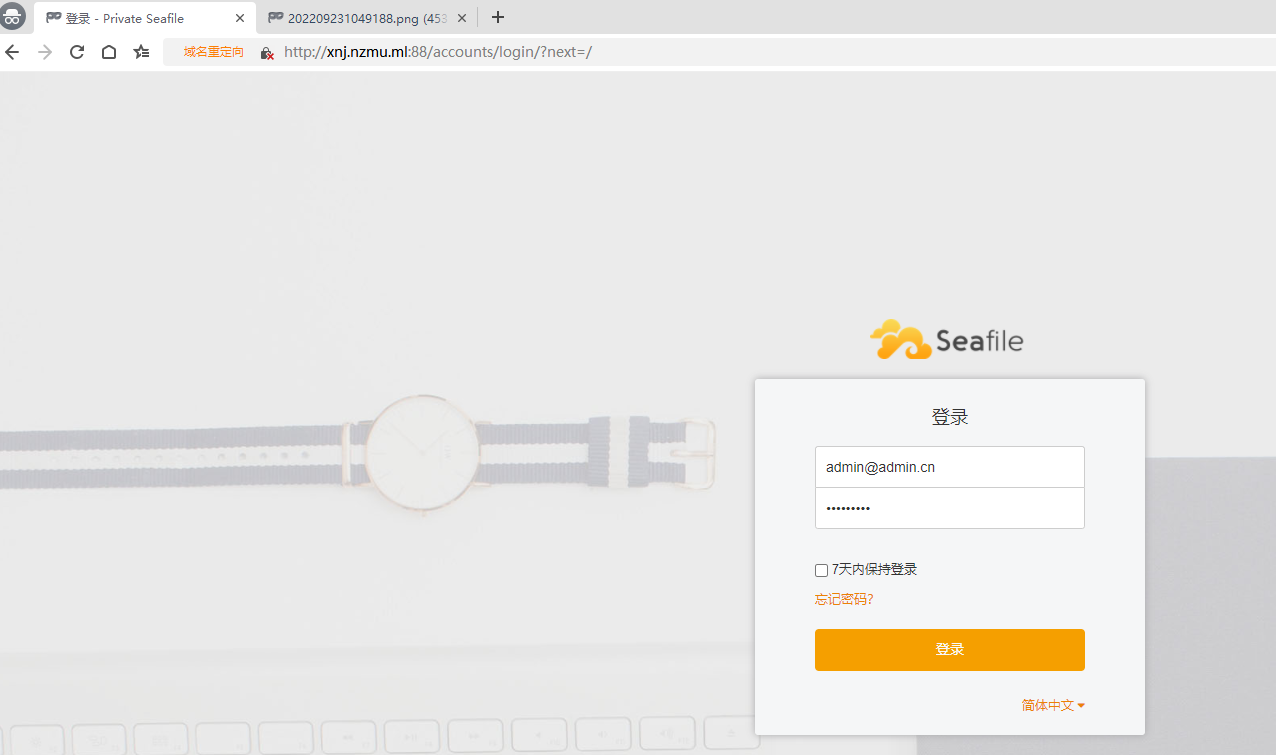
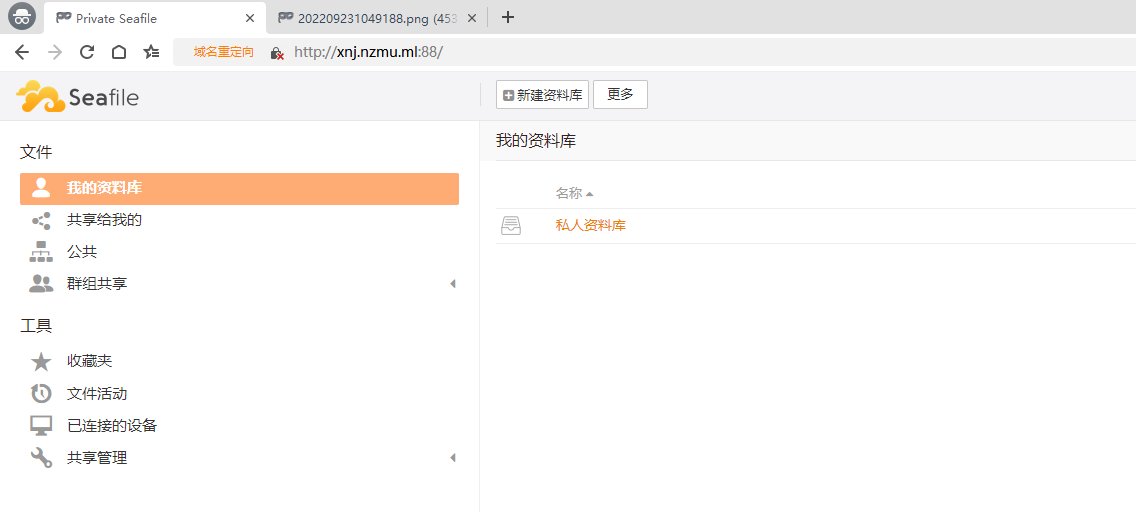
打开浏览器窗口,http://IP:端口,即可测试
八、seafile网站后台设置
进入网站后,点击右侧图标,选择
系统管理
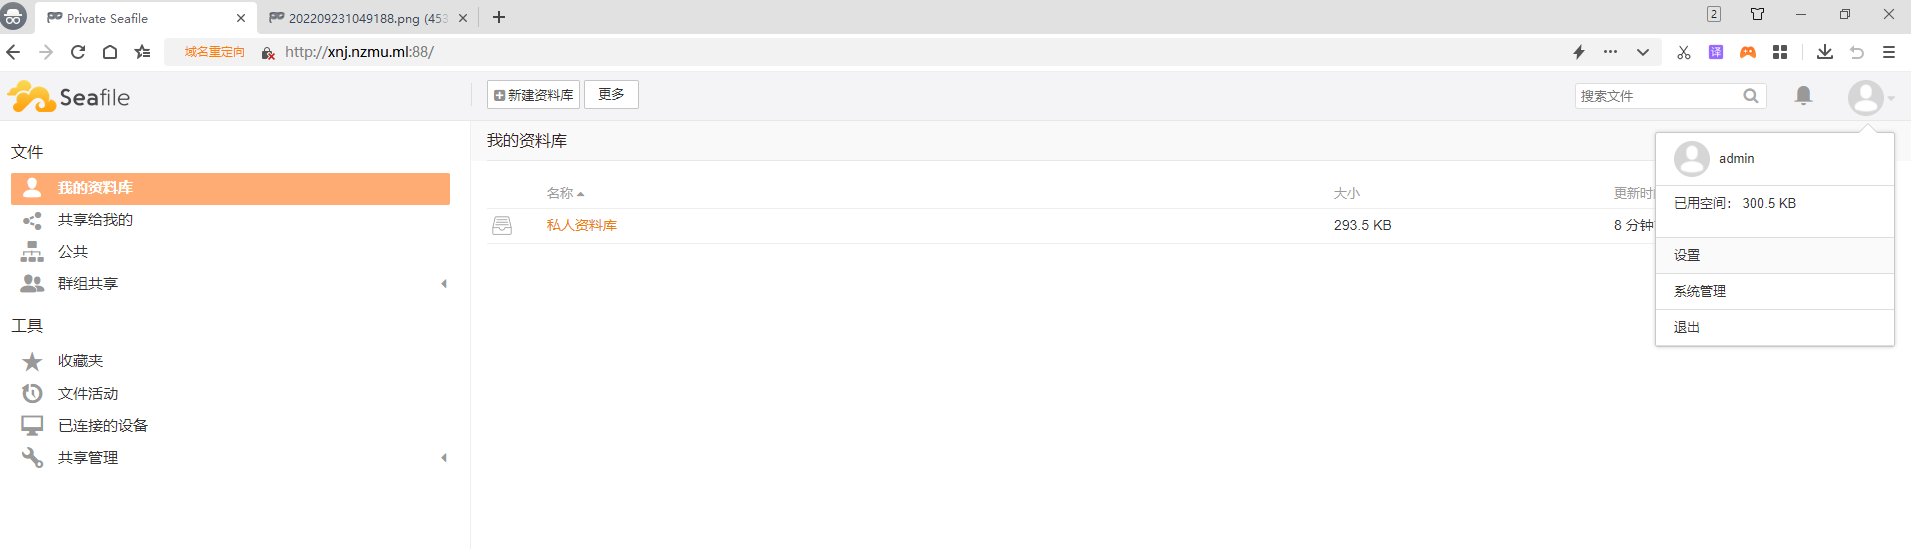
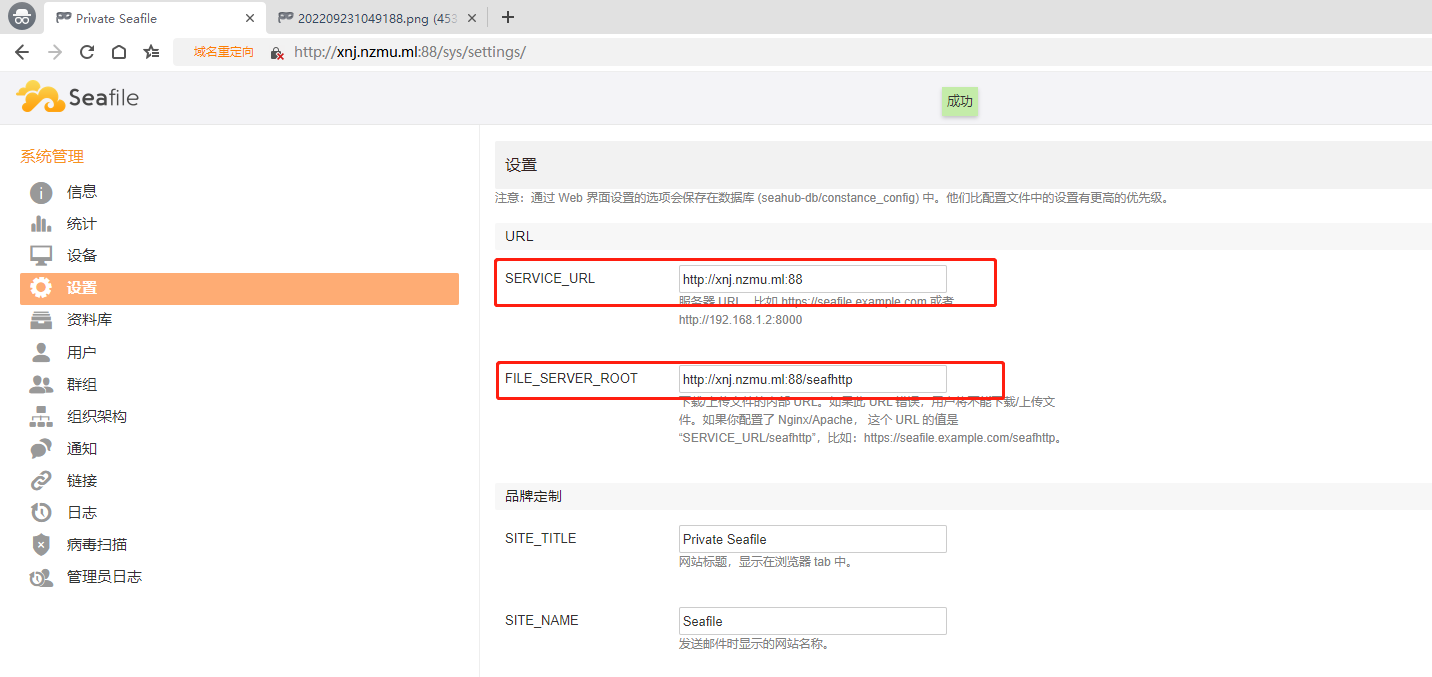
修改SERVICE_URL和FILE_SERVER_ROOT的值
SERVICE_URL:你的域名+端口
FILE_SERVER_ROOT:你的域名/seafhttp
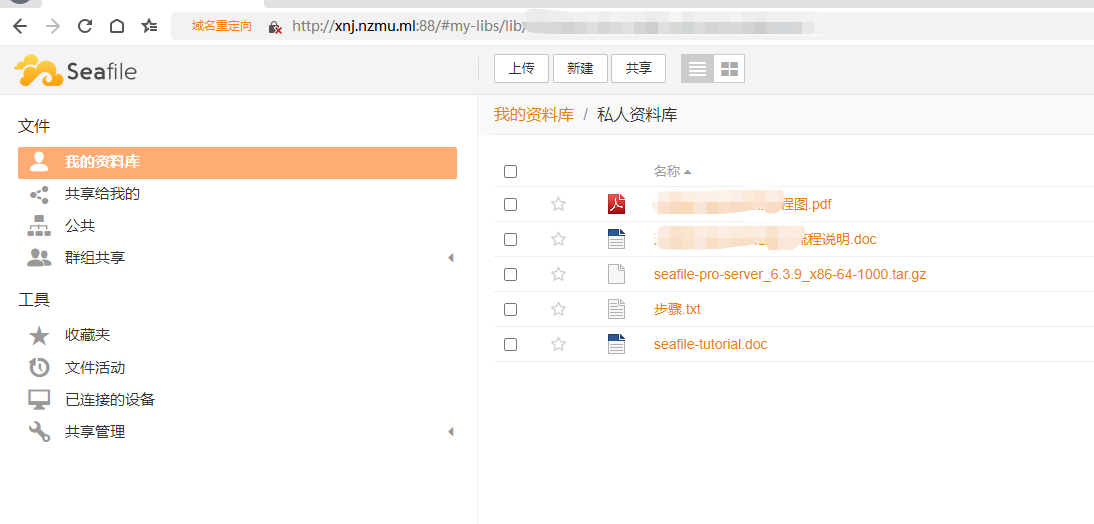
最后上传文件的效果图